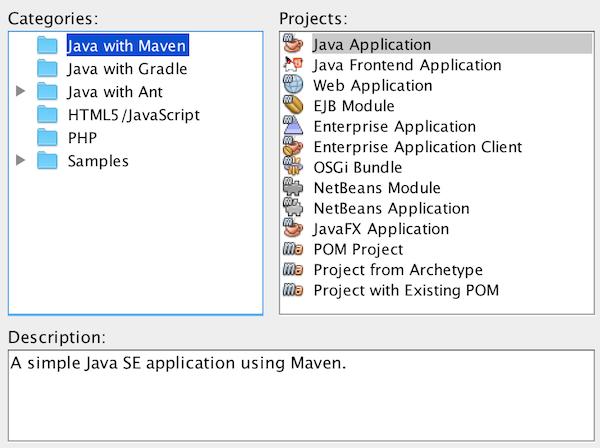
In this tutorial, which should take about 10 minutes to complete, you are given a quick introduction to the basic Java development workflow in NetBeans IDE.
| The aim of this tutorial is to get you started with Java development with Maven in NetBeans IDE. Though not needed to complete this tutorial, to get started understanding and working with the Java language itself, see the Java Tutorials, and to understand Maven, the Apache Maven Website. |
Take the steps below to set up a new Java project.

| The first time you create a new Java project, you will be prompted to download and enable support for Java. Follow the prompts and install as recommended by the wizard. |
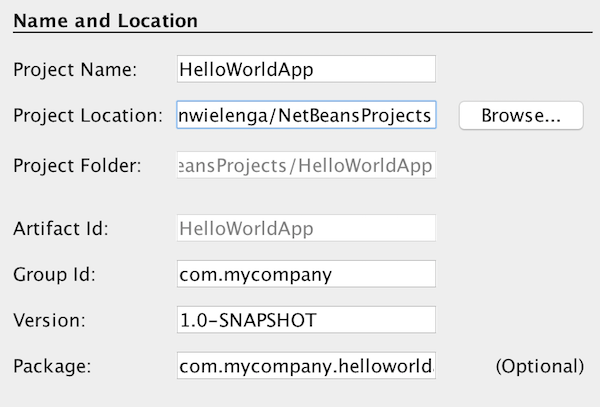
The project is created and opened.
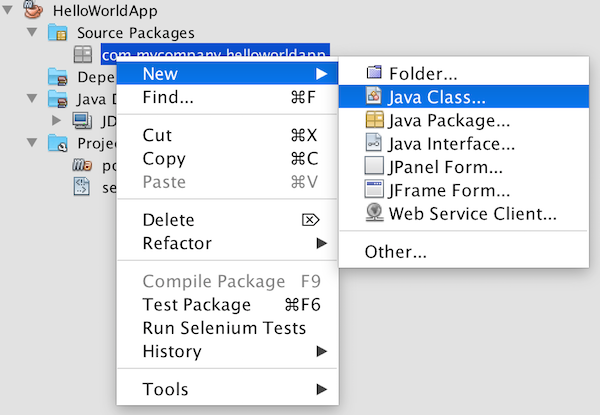
Right-click the package name and choose New | Java Class, (as shown in the figure below):
In the New Java Class wizard, type Main in the Class Name field, (as shown in the figure below):
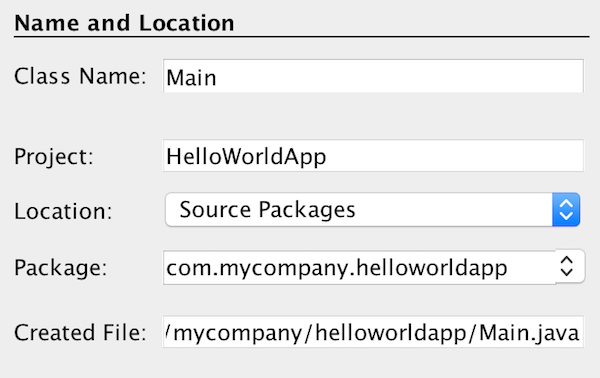 proj wizard4 maven small" />
The Java source file is created and opened.
You should see the following components, (as shown in the figure below):
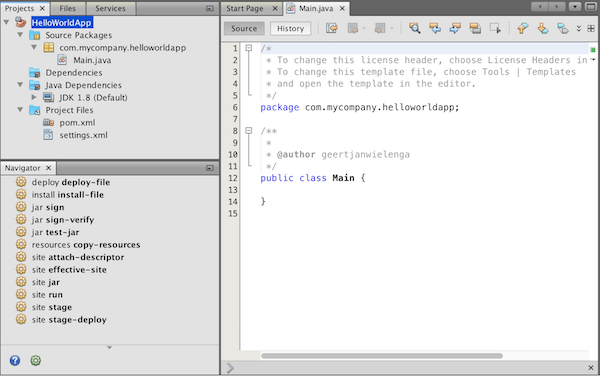
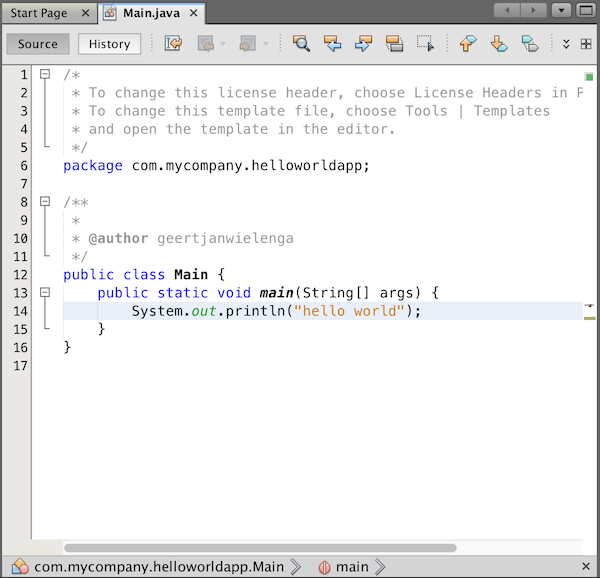
A skeleton main class has been created for you. Let’s add some basic content to produce a 'hello world' message.
You should now see the following:
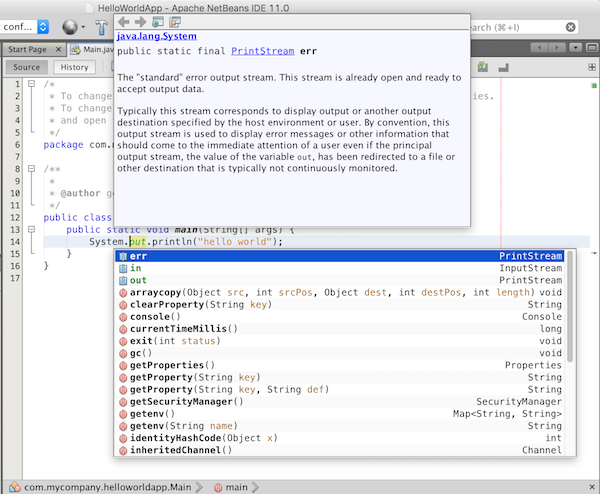
Notice that when you press Ctrl + Space , the editor shows you multiple ways of completing the code at the cursor, as well as related documentation:
Make sure to save the Java source file, right-click the project and choose Run or choose Run Project under the Run menu. Click Select Main Class.
In the Output window (which can be opened from the Window menu), you should see the below.
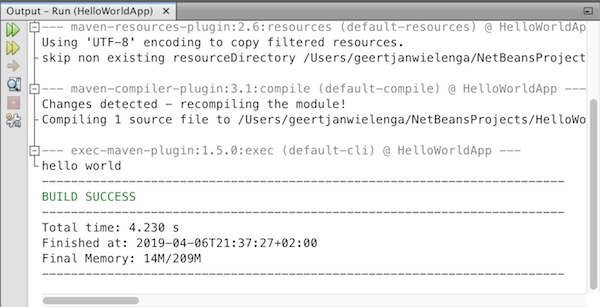
Congratulations! Your application works.
You can view the build output by opening the Files window (from the Window menu) and expanding the target node.
You now know how to accomplish the most common Java development tasks. To learn the complete Java development workflow, including testing and debugging, see Developing General Java Applications.